Sunday, October 10, 2010
Saturday, October 2, 2010
Encrypt Your E-Mail
 Your e-mail holds the bulk of your online information. Unfortunately, that information is out in the open. That is, unless you decide to encrypt it so only you can determine who can read it.
 The growth of the internet, and e-mail in particular, has given rise to numerous types of encryption software for the secure transmission of information. There are various reasons for wanting to encrypt your e-mail today:
- Client confidentiality. You need to transmit sensitive commercial information over e-mail, and you don't want people who sneak onto or steal your computer to compromise your clients' privacy.
- You want to avoid prosecution by the government. Perhaps you you live under an authoritarian regime that is trying to infringe on your civil liberties. We'll give you the benefit of the doubt here.
- You are a business owner or the head of an organization targeted by digital con artists and you need a system to authenticate your identity amongst your clientele.
- You read "Cryptonomicon" by Neal Stephenson and you geeked out on the encryption descriptions
Encryption on the internet is not unlike your typical lock and key combination. What you'll need to do is choose the lock, in the form of encryption platform, and then generate a key to lock (encrypt) or unlock (decrypt) your data.
Choose your lock
There are various encryption platforms. Some popular standards include:
- Advanced Encryption Standard (AES)
- Triple Data Encryption Algorithm (TDEA), X.509
- Various flavors of Pretty Good Privacy (PGP), including Open PGP and Gnu Privacy Guard (GPG)
Because encryption ought to be tightly integrated with your e-mail client, the standard you end up using is probably going to be determined by what works with your e-mail client of choice. For example, Microsoft Outlook comes with TDEA encryption, Apple's Mail supports X.509 encryption, and there is a GPG add-on for Firefox that works with Google's GMail.
Create your keys
To get started with encryption, you need to create an encryption key pair, which is like a digital signature and pass code. Your e-mail client or stand-alone encryption software might be able to create these keys for you or you may be directed to the web site of a certificate authority such as Thawte or Verisign to create and store your key.
Enter your full name, your e-mail address, and create a pass phrase that will ensure that only you can use your key. Your pass phrase should be fairly long and complicated - you shouldn't use names, dates, addresses, or anything else that can be easily guessed at. One simple method is to use mondegreens; you know, those misinterpreted words you used to sing along with, until you learn what the real lyrics really are and become terribly embarrassed. For example, Jimi Hendrix's "'scuse me, while I kiss this guy."
Certificate authorities create a key pair of both a private and a public key for you. The only people who should have access to your private key are you and the certificate authority; this key is what allows you to encrypt files and decrypt files meant just for you. The public key is freely distributed to anyone you correspond with; it allows other people to check your digital signature to confirm that you are the actual author, and it allows them to encrypt files and messages that only you can decrypt. Depending on the encryption standard you are using, you may have to send people your public key by attaching a file, or it may be automatically downloaded from the certificate authority's public key server.
Start encrypting!
The two most common functions of encryption software are Signing and Encrypting. Signing an e-mail lets anyone who has access to your public key decrypt the message, and serves to confirm that you are the original author. Signing is useful in situations where unsavory characters may be sending out fraudulent information in your name and you need people to know what information is really coming from you. Encrypting scrambles plain text or file attachments and only allows the intended recipient to access them. Encrypted files and messages are also signed as a matter of course, so the recipient can also confirm that the message they are decoding did actually come from you.
In the Future
As computers get more powerful, it becomes easier to crack encryption. In fact, one of the very first digital computers ever created, Colossus, was used to decrypt German codes during World War II. Typically as code breakers get more powerful, encryption systems just use longer and longer codes to slow down brute-force attempts to guess them: right now most desktop encryption software offers up to 4,096-bit encryption.
An entirely new system of encryption is being developed that takes advantage of the principles of quantum mechanics: quantum encryption creates an entangled key pair of qubits that is shared among two parties. These entangled qubits allow the two parties to share information securely, and - due to the peculiar role observation plays in quantum mechanics - also alerts them if anyone is attempting to eavesdrop on their secure channel. Quantum cryptography is already running on experimental military and university communication networks, and if the example of the World War II code-breaking machines is any indication, it's only a matter of time until the technology trickles down to consumers.
Thursday, July 8, 2010
DIY tablet kit is less than $400, more complicated than an iPad

Tired of The Man holding you down on the tablet front with his oppressive App Stores, his tyrannical carrier constraints, and other outrageous insults to your civil liberties? Well now you can break free of this stranglehold, thanks to a company called Liquidware and its open source, DIY tablet starter kit. The premise is simple: Liquidware provides a touchscreen OLED display (4.3-inch, 480 x 272, resistive touch), the BeagleBoard guts (a single-board computer driven by a 720MHz ARM Cortex-A8 OMAP3530 CPU, with 2GB of NAND and an SD card slot), and the BeagleJuice battery module, along with an SD card pre-loaded with Angstrom Linux. You put all the pieces together and then just basically go nuts, designing your own application marketplace, infrastructure for direct-to-consumer video and audio sales, and a revolutionary and magical user interface that blurs the lines between waking life and a hallucinatory dream-state where anything is possible, and the only limitation is yourself. Check the Moscone Center's booking information below to see scheduling availability for your developer conference, and hit the source link to offer up your $393.61 to Liquidware.
Sunday, May 23, 2010
SmartBro ZTE MF637 HSUPA modem unlocking
My intention is to look for MF627 unlocking technique for my SmartBro Plug It modem, I downloaded some apps and follow some instructions posted in some forums.
I did not succeed on MF627. Quite unhappy... I was thinking to put my next target my other modem which is model MF637 for unlocking. At first I'm afraid that it might brick the firmware, because there are some suggestions that it is only intended for MF627. Huhh... the hell...what I was thinking... and so I made up a choice to take the risk.
Before unlocking;
a. My Smartbro dashboard is installed and modem drivers, typical installation for SmartBro to work/connects.
b. Replace your Smartbro sim card (e.g. Globe or Sun SIM)
From one of the applications given to unlock MF627 is DC-Unlocker 2 Client v1.00.0460
1. Download the file DC-Unlocker 2 Client (dccrap.zip)
2. Unzip/Extract to any folder or to your desktop
Now Plug in your Smartbro modem with Globe or Sun SIM inserted on it.
3. run the dccrap.exe
4. Select Manufacturer = ZTE datacards
5. click "server"
6. Enter Username/Password of your choice then click "Check Login".
For me, I enter smartbro for both userb=name and password
7. Click on the the Magnify Glass icon to search your modem model automatically.
Dont need to Select model manually.
Just wait for the modem to sync, sometimes reading the datacard is slow.
8. Once your modem has been detected, Click "Unlocking" then UNLOCK it.
You will be then prompted unlocking successful!
Now, Open your Smartbro dashboard, it takes a while to sync in the modem.
From my experiment, I use Sun sim card. Once it catches the signal, you can notice it from the dashboard, signal .::| and the network name (SUN)
Then I configured my Network Settings to Sun Internet on my dashboard.
Name: Sun Wireless(any name of your choice)
Dial Number: *99#
APN: minternet
Set it to default.
Load up with i50 (24 hours unlimited) with 5 pesos regular load balance.
Then here it goes....

Now I wont have to use a strainer to catch that signal of Smart, because we are near to Sun cell site here in Laguna.

This is the internal antenna of SmartBro Plug-It USB modem


If you find this topic helpful to you, kindly post comments of appreciation.
Goodluck! and happy homebrewing(hacking)... =)
BTW, this USB modem MF637, I got it from an event for free.
Tuesday, May 11, 2010
Ubuntu 10.04 Login Screen and other things.
Here is how:
It's best to chage your image to the resolution of your monitor - use gimp?
It may be easier to put the background image you wish in /usr/share/backgrounds first if not already there, doesn't really matter
-log out
-at the log in screen press CTRL+Alt+F1,
-enter user name and password
-Code:
export DISPLAY=:0.0
-press enter
Code:
-sudo -u gdm gnome-control-center
-press enter, expect errors,
-when terminal output stops press CTRL+Alt+F8
The Gnome Control Center should appear (it looks exactly the same as Appearance preferences from the Gnome Desktop, but , it relates to the login screen in this case.)
In Appearance
-choose Add and pick a new background, (or browse to one if it's in a different folder)
-close Gnome Control Center,
-press CTRL+Alt+F1
-at the terminal cursor type code:
sudo reboot
--cybercon
Dell Vostro1400 Core2Duo T7250,4GB DDR2,Ubuntu-10.04LTS 64bit|Windows 7 Premium 64bit
Sunday, May 9, 2010
External antenna plug in to USB Plug It Modems


Php490.00 external antenna plug in to usb to increase signal and speed on your USB plug it
Tuesday, December 22, 2009
I found another source for a low cost antenna to increase broadband signals for your internet USB plug it for SUN, GLOBE or SMART, Just place it in a window to get more strength and faster internet browsing.
Company: Wireless Link Technologies, Inc
Address: 540 Gonzalo Puyat St., Sta. Cruz, Manila
Telephone: (632) 3936848
Mobile: +639227493272
Email: info@wireless-link.net
P 490.00
Contact Nos. : 632 3936848, +639227493272
Terminal Command Line Web Browsing

We have all been introduced to a graphical web browsing about couple of decades, from way back use of Netscape and then comes IE developed by Microsoft and now with Firefox as well with other browsing tools available for both mobile and desktop computing.
How bout going back to an oldschool BBS or maybe using the CLI(command line interface) for discreet browsing. CLI browsing doesn't load images for graphical view and more of a keyboard typing is required.
Have anyone gone to BBS(bulletin Board System)? It is a command line interface using telnet or HyperTerminal which can connect to forums, emails, relay chatting, file transfer etc.

For some noob linux users, have you tried browsing the web using your Terminal command line interface?
There is some enhanced command lines that can be use in order to browse the web with CLI or Terminal. I use this mostly in some forum sites and emails.
Here's how.
#For Ubuntu you can use the 'w3m' command
#open your Terminal
$ w3m www.google.com
# Or you may explore the command extension for your preference with the help menu
$ w3m --help
or
$ w3m
There are also other which has same function and feature. You may also try 'links', 'links2' & 'lynx'
depending on which flavor you'd prefer. For me, I use links and links2 command. Also, some mouse clicks works with it, but still requires more of a typing skills.
You may also install it all so you can shift either which to use.
$ sudo apt-get install lynx
ex.
$ lynx www.xcon-technix.blogspot.com
$ sudo apt-get install links
ex.
$ links www.xcon-technix.blogspot.com
$ sudo apt-get install links2
ex.
$ links2 www.xcon-technix.blogspot.com

--Cyb3rc0n-05092010
/end
Saturday, May 8, 2010
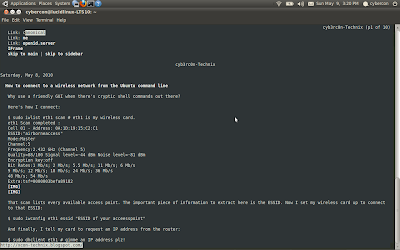
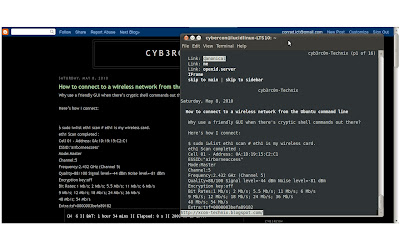
How to connect to a wireless network from the Ubuntu command line
Here’s how I connect:
$ sudo iwlist eth1 scan # eth1 is my wireless card.
eth1 Scan completed :
Cell 01 - Address: 0A:1D:19:15:C2:C1
ESSID:"airborneaccess"
Mode:Master
Channel:5
Frequency:2.432 GHz (Channel 5)
Quality=88/100 Signal level=-44 dBm Noise level=-81 dBm
Encryption key:off
Bit Rates:1 Mb/s; 2 Mb/s; 5.5 Mb/s; 11 Mb/s; 6 Mb/s
9 Mb/s; 12 Mb/s; 18 Mb/s; 24 Mb/s; 36 Mb/s
48 Mb/s; 54 Mb/s
Extra:tsf=0000003befa89182


That scan lists every available access point. The important piece of information to extract here is the ESSID. Now I set my wireless card up to connect to that ESSID:
$ sudo iwconfig eth1 essid "ESSID of your acceesspoint"
And finally, I tell my card to request an IP address from the router:
$ sudo dhclient eth1 # gimme an IP address plz!
There is already a pid file /var/run/dhclient.pid with pid 6911
killed old client process, removed PID file
Internet Systems Consortium DHCP Client V3.0.6
Copyright 2004-2007 Internet Systems Consortium.
All rights reserved.
For info, please visit http://www.isc.org/sw/dhcp/
wmaster0: unknown hardware address type 801
wmaster0: unknown hardware address type 801
Listening on LPF/eth1/00:1c:bf:96:7e:21
Sending on LPF/eth1/00:1c:bf:96:7e:21
Sending on Socket/fallback
DHCPREQUEST of 192.168.1.112 on eth1 to 255.255.255.255 port 67
DHCPACK of 192.168.1.112 from 192.168.1.1
bound to 192.168.1.112 -- renewal in 251284 seconds.
I can type these three commands way faster than waiting for the GUI to fire up. Here they are again, without all the output:
$ sudo iwlist eth1 scan
$ sudo iwconfig eth1 essid "ESSID of your acceesspoint"
$ sudo dhclient eth1
Sometimes, I need to connect to a network with a hidden ESSID. That’s just as easy. I just configure the ethernet card to connect to anything:
$ sudo iwconfig eth1 essid any # any is a keyword, not the name of an ESSID.
Finally, some networks require an access key. Sometimes, people can give you the human-friendly version, and you can type that in like this:
$ sudo iwconfig eth1 key s:password # translates to the hex for me.
Note the s: in front. That translates what I type into the hex jibberish.
Other times, people insist on giving you the goofy string of hex digits, so you can set it like this:
$ sudo iwconfig eth1 key ACDB-1234-1234-EFG2
How to connect to a wireless network from the Ubuntu command line
Here’s how I connect:
$ sudo iwlist eth1 scan # eth1 is my wireless card.
eth1 Scan completed :
Cell 01 - Address: 0A:1D:19:15:C2:C1
ESSID:"bestcoffee"
Mode:Master
Channel:5
Frequency:2.432 GHz (Channel 5)
Quality=88/100 Signal level=-44 dBm Noise level=-81 dBm
Encryption key:off
Bit Rates:1 Mb/s; 2 Mb/s; 5.5 Mb/s; 11 Mb/s; 6 Mb/s
9 Mb/s; 12 Mb/s; 18 Mb/s; 24 Mb/s; 36 Mb/s
48 Mb/s; 54 Mb/s
Extra:tsf=0000003befa89182
That scan lists every available access point. The important piece of information to extract here is the ESSID. Now I set my wireless card up to connect to that ESSID:
$ sudo iwconfig eth1 essid "bestcoffee"
And finally, I tell my card to request an IP address from the router:
$ sudo dhclient eth1 # gimme an IP address plz!
There is already a pid file /var/run/dhclient.pid with pid 6911
killed old client process, removed PID file
Internet Systems Consortium DHCP Client V3.0.6
Copyright 2004-2007 Internet Systems Consortium.
All rights reserved.
For info, please visit http://www.isc.org/sw/dhcp/
wmaster0: unknown hardware address type 801
wmaster0: unknown hardware address type 801
Listening on LPF/eth1/00:1c:bf:96:7e:21
Sending on LPF/eth1/00:1c:bf:96:7e:21
Sending on Socket/fallback
DHCPREQUEST of 192.168.1.112 on eth1 to 255.255.255.255 port 67
DHCPACK of 192.168.1.112 from 192.168.1.1
bound to 192.168.1.112 -- renewal in 251284 seconds.
I can type these three commands way faster than waiting for the GUI to fire up. Here they are again, without all the output:
$ sudo iwlist eth1 scan
$ sudo iwconfig eth1 essid "bestcoffee"
$ sudo dhclient eth1
Sometimes, I need to connect to a network with a hidden ESSID. That’s just as easy. I just configure the ethernet card to connect to anything:
$ sudo iwconfig eth1 essid any # any is a keyword, not the name of an ESSID.
Finally, some networks require an access key. Sometimes, people can give you the human-friendly version, and you can type that in like this:
$ sudo iwconfig eth1 key s:password # translates to the hex for me.
Note the s: in front. That translates what I type into the hex jibberish.
Other times, people insist on giving you the goofy string of hex digits, so you can set it like this:
$ sudo iwconfig eth1 key ACDB-1234-1234-EFG2
Lucid Lynx 10.04 LTS
-
There are so many questions on how to block https www.facebook.com in the internet, yet there is no easy answer for it. Facebook and othe...
-
Recent STF(search the forum) I found how to unlock my ZTE MF637 HSUPA 3g modem. My intention is to look for MF627 unlocking technique for my...


