Saturday, December 10, 2011
Mount NTFS Seagate GoFlex External Drive on FreeNAS 7
I just rebuilt my Home freeNAS 7 box and re-installed it on a
Pentium 4 1.80Ghz, 512mb RAM. It has 20gb internal drive to host freeNAS 7
and a 500gb Seagate GoFlex 3.0 USB external drive. In short, I am running this
in an old laptop junkie, it can draw back up to 35watts power consumption and
there is still available slot for another 500gb USB external drive incase I need to.
My Goflex external drive is partitioned into two (2). In order to share my external drive via freeNAS,
I need to do the following or add it to Systems >Advanced>Command Scripts
First, create the mount directory:
login via SSH
# ssh -l admin 192.168.1.250
# mkdir /mnt/goflex-data
# mkdir /mnt/goflex-160
Now add below commands to Systems>Advanced>Command Scripts using the GUI.
Command Type
kldload fuse PreInit
ntfs-3g /dev/da0s2 /mnt/goflex-data PreInit
ntfs-3g /dev/da0s1 /mnt/goflex-160 PreInit
Mount NTFS Seagate GoFlex External Drive manual commands using the terminal.
SSH to freeNAS server
# kldload fuse
# /mnt/goflex-160# ntfs-3g /dev/da0s2 /mnt/goflex-data
# /mnt/goflex-160# ntfs-3g /dev/da0s1 /mnt/goflex-160
Sunday, November 27, 2011
Middle Mouse Button Scrolling on Linux (Fedora 15)
We need to find the UDI (Unique Device Identifier) for the TrackPoint device. It's an input device and it's a mouse, so let's try to find that capability:
CREDITS TO DENNIS CONRAD
This was edited according to cyb3rc0n's personal fedora15 config settings using A4TECH wireless optical mouse.
# hal-find-by-capability --capability "input.mouse"
/org/freedesktop/Hal/devices/platform_i8042_i8042_AUX_port_Synaptics_pass_through_logicaldev_input
Only one hit. With that we can get a lot of information about the device:
[root@linuxfed15 conrad]# lshal -u "/org/freedesktop/Hal/devices/usb_device_9da_54f_noserial_if1_logicaldev_input"
udi = '/org/freedesktop/Hal/devices/usb_device_9da_54f_noserial_if1_logicaldev_input'
  info.capabilities = {'input', 'input.mouse'} (string list)
  info.category = 'input'  (string)
  info.parent = '/org/freedesktop/Hal/devices/usb_device_9da_54f_noserial_if1'  (string)
  info.product = 'A4TECH USB Device'  (string)
  info.subsystem = 'input'  (string)
  info.udi = '/org/freedesktop/Hal/devices/usb_device_9da_54f_noserial_if1_logicaldev_input'  (string)
  input.device = '/dev/input/event7'  (string)
  input.originating_device = '/org/freedesktop/Hal/devices/usb_device_9da_54f_noserial_if1'  (string)
  input.product = 'A4TECH USB Device'  (string)
  input.x11_driver = 'evdev'  (string)
  linux.device_file = '/dev/input/event7'  (string)
  linux.hotplug_type = 2  (0x2)  (int)
  linux.subsystem = 'input'  (string)
  linux.sysfs_path = '/sys/devices/pci0000:00/0000:00:1d.0/usb2/2-1/2-1.1/2-1.1:1.1/input/input7/event7'  (string)
# hal-get-property --udi "/org/freedesktop/Hal/devices/platform_i8042_i8042_AUX_port_Synaptics_pass_through_logicaldev_input" --key "info.product" A4TECH USB Device


# hal-get-property --udi "/org/freedesktop/Hal/devices/platform_i8042_i8042_AUX_port_Synaptics_pass_through_logicaldev_input" --key "linux.device_file" /dev/input/event7
Now we can put together a config file in /etc/X11/xorg.conf.d/ :# nano /etc/X11/xorg.conf.d/42-middle-mouse-scrolling.confSection "InputClass" Identifier "Middle Mouse Button Scrolling" MatchProduct "TPPS/2 IBM TrackPoint" MatchDevicePath "/dev/input/event*" Option "EmulateWheel" "true" Option "EmulateWheelButton" "2" Option "XAxisMapping" "6 7" Option "YAxisMapping" "4 5" EndSectionIf you dont have yet the conf file just copy/paste from Section down to EndSection and then save.
NOTE: We're using "/dev/input/event*" instead of "/dev/input/event6" to make sure our configuration still works should the device path change for any reason
The only thing missing now is a restart of X and we're done. Reboot!CREDITS TO DENNIS CONRAD
This was edited according to cyb3rc0n's personal fedora15 config settings using A4TECH wireless optical mouse.
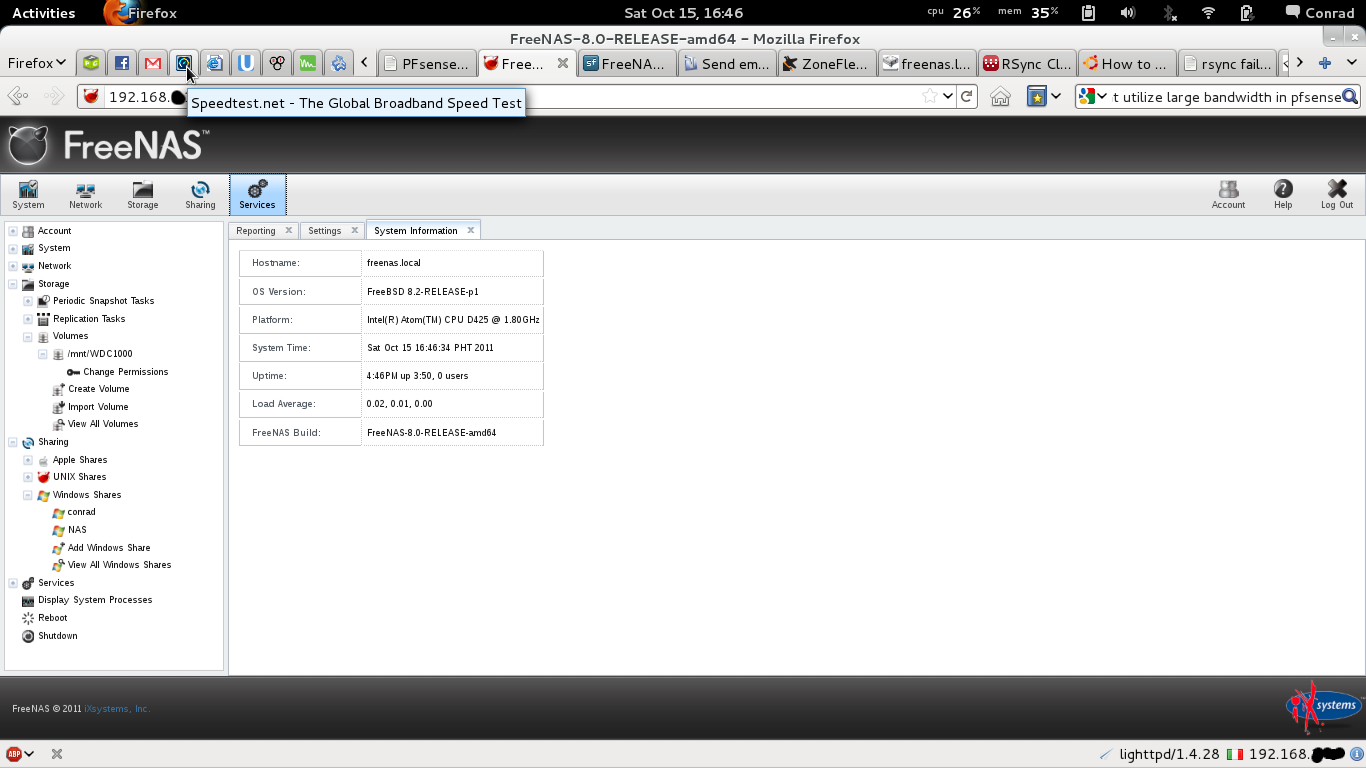
Saturday, October 15, 2011
my HOMEBREW Home Storage Server --
Hardware is powered by:
- Intel D425KT Atom based processor 1.80Ghz
- 4gb DDR-1333 RAM/memory SODIMM
- WDC 1 Terabyte SATA hard drive
- 512mb microSD & USB memcard reader for FreeNAS installation.
- Others, were old parts from old PC's which are still good ATX casing & ATX Power Supply.


512mb SanDisk M2 memory card and a memory card reader. I will install FreeNAS 8 on it. You can download and read more about FreeNAS at http://www.freenas.org/

I use an opensource FreeNAS 8 to operate necessary features to drive the server to its purpose - but I preferred FreeNAS 7.
After successful setup, you can then connect it to your modem/router/wifi to access, save, and stream audio video personal files from your laptops, desktops and even to your wifi phone. You can also backup your data files from your laptop and wifi phone if in-case your phone or laptop crashes or even loosing it from anywhere.
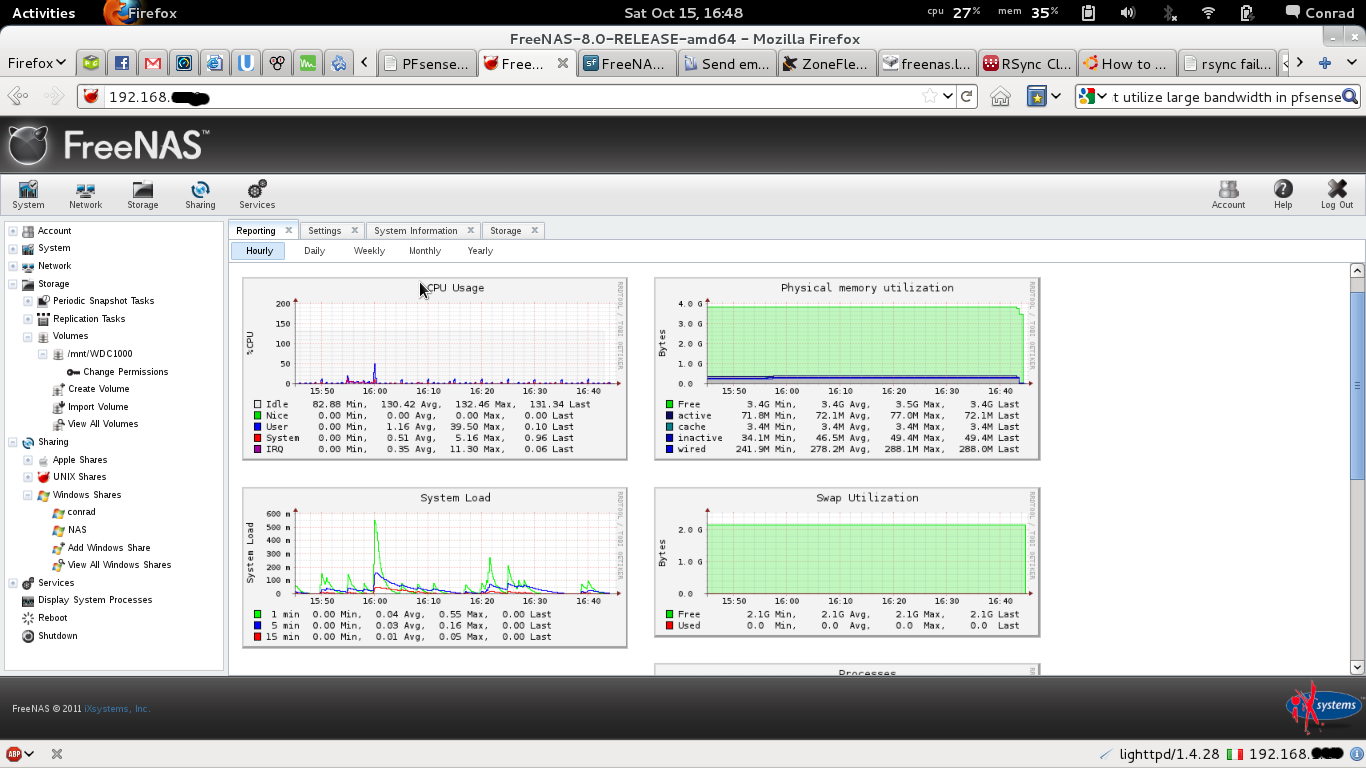
Below is my network setup at home.

* This project setup is currently on test mode and right now it works fine and currently using it at home. I was planning to upgrade disk capacity and with rugged use to at least 2Terabytes in RAID1. But I need to have a PCI SATA-RAID controller card.
** This is not a tutorial on how-to-install FreeNAS. Just showing up the cheap mainboard I got with few old componenets and built it as my home storage server for family use.
Friday, July 15, 2011
My Openshot Video Edit Test
Recently I learned from Category5.tv about Openshot Video. I installed it few days ago and now I have the chance to try it out to see if I could stay using Linux as my main video editing box on full open source application. By the way, Im a Linux Fedora fan and also I can manage to work in a cross-platform between linux (fedora/ubuntu..etc.) and Microsoft windows based systems.
The final output video was uploaded to Youtube initially, but it was blocked due to copyright policy. So now I can use the copyleft :) ...uploaded to my Facebook videos and Vimeo (not sure if vimeo would block it soon). Because the two video formats I used was official entry video in high definition formats downloaded in .flv and the other is an .mp4 format - so i could test 'Import' file compatibility using Openshot application on different encoding formats.
You can watch it on this link Original+Parody or you can view the embedded video below. Check out Openshotvideo.com also.
This video editing test alone was done in less than an hour - not to include dowloading/uploading of videos.
Here are some screenshots:
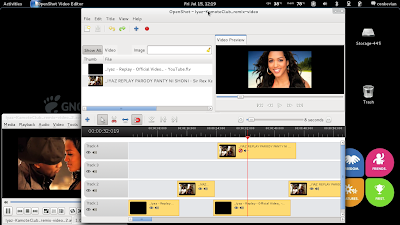
You can create a multi-track depending on which track you preffered to PAN-view or track mute others if not needed on simulteneous track play.


Allows you to 'Export' the video in HD formats in different variant levels depending on your desired quality or reproduction.

My editing hardware is Lenovo Essential G470 core i3(2nd-gen) with a 4Gb/1333 RAM running 64bit Linux Fedora 15 / Gnome3.

Now here's the video saved/uploaded in HD 720 25p format:
Iyaz - Shoni video remix using Openshot opensource application. [HD] from conradq5 on Vimeo.
Saturday, July 9, 2011
Monday, July 4, 2011
Video Editing 101 using Opensource Application
Here is a featured video tutorial of OpenShotVideo by Robbie Fergusson (www.Category5.tv)
Using linux platform you can perform video editing using free softwares with Ubuntu for common linux desktop systems and or like me which I have done this tutorial from my Redhat based Fedora-15 linux system.
Recommeded Software:
OpenShot Video Editor (Linux)
Blender (Windows/Mac/Linux)
Inkscape (Windows/Mac/Linux)
Enjoy & have fun with the video tutorial and then make your own video afterwards...
Saturday, June 18, 2011
inSSIDer -- Wi-Fi Scanner/Analyzer for Linux
Install inSSIDer 2 (Alpha) on Fedora 15

1. Download inssider-0.1.1.0429-1.x86_64.rpm (for 64 bit)
inssider-0.1.1.0429-1.i386.rpm (for 32 bit)
download it from github https://github.com/metageek-llc/inSSIDer-2-Cross-Platform/downloads
“but DONT run the .rpm downloaded file – we will install it using the terminal”
2. Open Terminal – go to the folder where you have downloaded the file.
I installed it using root ( you need to type 'su' then 'password')
I have downloaded/save the file on Downloads folder.
# cd Downloads
# yum localinstall --nogpgcheck inssider-0.1.1.0429-1.x86_64.rpm
# yum install mono-web
...and dont forget this to be able to run inSSIDer
# yum install webkit-sharp
You can check out more of Metageek inSSIDer 2 (Alpha) here http://www.metageek.net/products/inssider/linux
Have fun and enjoy!
Sunday, May 22, 2011

Sunday, May 15, 2011
Recover your Ubuntu Unity desktop-profile from messed Compiz settings
Recently playing with Ubuntu 11.04 Unity desktop. Tweaking some of my work around, I found this quite helpful 'Things to Tweak after Installing Ubuntu 11.04 Natty-Narwhal Unity desktop'.
I come up to play with compiz settings and kinda set things up accordingly for a test. Suddenly I messed it up and 'unity desktop' is gone, no side bars and top panel.
And so, I tried to make another user from Ctrl-Alt-F1, login as root
# adduser 'newuser'
# passwd newuser
Well eventually it works out fine, but I have to reconfigure everything I built under that profile like browser settings, plugins, etc.
Inorder to recover everything back, I found this solutions from http://ubuntu4beginners.blogspot.com/2011/04/missing-top-and-side-panels-in-unity. http://ubuntu4beginners.blogspot.com/2011/04/missing-top-and-side-panels-in-unity.html
Monday, April 4, 2011
How to Block HTTPS(443) Social Networking Sites on your Private/Business Network
There are so many questions on how to block https www.facebook.com in the internet, yet there is no easy answer for it. Facebook and other social networking are need to be block in school and other other establishment because it affects the productivity of students and employees.
In my case, I been blocking facebook.com in pfsense server through squid. Although it is working perfectly , some users have found a way out by accessing the same url with https in place of http. To solve the problem I need to block https www.facebook.com in firewall rules.
In my case, I been blocking facebook.com in pfsense server through squid. Although it is working perfectly , some users have found a way out by accessing the same url with https in place of http. To solve the problem I need to block https www.facebook.com in firewall rules.
How to Block https www.facebook.com
To do this of course we need to a pfsense firewall in the our network. We need to download the installer from this link. You need also to install the squid proxy server to block some of the restricted websites. Here is how to install and configure Squid as a transparent proxy on pfSense.
Assuming that you already have pfSense setup. The next thing that we’re going to make is an alias. Select ‘Aliases’ from the firewall menu. Hit the ‘+’ icon to make a new one. You’ll see a screen that looks like this:

Create another alias for the port. Use port 443 for https and port 80 for http websites.

We’ve created the needed aliases, so now we need to tell pfSense to do something about it. So, from the Firewall menu again, add a Rule. We need the rule to go on our LAN tab.
 Set the above rules based on these criteria:
We’ve created the needed aliases, so now we need to tell pfSense to do something about it. So, from the Firewall menu again, add a Rule. We need the rule to go on our LAN tab.
- Reject the the traffic from the LAN
- TCP connections
- source is any
- any/none OS
- Destination - select host or alias and put in the name of your alias.
- Set the Destination ports as other and select https
- No need for any of the advanced options
- leave the schedule as none
- leave the gateway default
- and give it a descriptive name for future reference.
- Now, Save and Apply. You’re done.
Credits to: -- Originally from Tech Tak Talk by Ramel dela Cruz. His new blog link here.
Sunday, March 6, 2011
Single Interface Squid Proxy Server
This is a brief introduction to Squid proxy that covers Setting up Squid on Ubuntu/Debian with a single network card, and routing traffic through it. I use this for testing websites remotely before putting them live, but it would also be possible to setup a similar box to monitor network traffic.
Before you begin you should have a computer setup with Ubuntu/Debian. I am using Ubuntu 10.04 LTS for my proxy. The rest of these instructions will assume that this is installed and configured on your network as you want it. Also note that Debian users should su to root instead of typing sudo.
1. Get squid
First thing’s first, we need to get squid. This can be achieved by typing the following into the terminal:
sudo apt-get install squid
This will download squid from the repositories and set it up on your machine.
2. Setup Squid
This is easy if you know what you’re doing. The squid config file is in the /etc/squid/ directory, so open it up in a text editor:
sudo nano /etc/squid/squid.conf
Now we need to add the lines to allow access to your network. If you’re in nano you can use
Ctrl+w and type acl all src all
Since I’m setting this up as a remote server I have to allow my IP address for work to be able to access the proxy. Here’s the lines I added:
acl remotenet src 123.123.123.123 #Work’s external IP address
further down the script there’s a line that reads http_access allow localnet, under this line add:
http_access allow remotenet #allow connections to this proxy server from “remotenet”
Understanding this process
ACL is an access control list, which you’re assigning IP addresses to. in the above two lines you’ve allowed the IP address 123.123.123.123 access to the proxy server. You can continue adding IP addresses to the remotenet group my copying and pasting the first line you entered but with different IP addresses.
At the end to the file you’ll also need to add the following line of code:
visible_hostname someProxyServerName
Exit and save the squid.conf file by pressing Ctrl+x and pressing Y when asked if you want to save changes, followed by enter to overwrite the file.
restart squid: sudo service squid restart
3. Setting Up Your Web Browser
You should now be able to access your server by setting the proxy details up in your browser as the following:
Proxy: your squid IP address/DNS name
Port: 3128
courtesy of SIRNET
Squid Analysis Report Generator (SARG) and Webmin
The Squid Analysis Report Generator (SARG) enables you to see your Squid users internet usage. SARG provides many informations about Squid users activities like times, bytes, sites, etc. This article will show you how to use SARG through Webmin, a web-based interface for administering Linux.


 Next time you need to use the Squid Report Generator, look for it under Servers instead of Un-used modules.


Installing Webmin and SARG
1. Add the RPMforge repository into Yum. We will be getting the SARG RPM package for Red Hat/CentOS from RPMforge.

2. From a terminal window, type in the command below to install SARG.
yum install sarg

3. Install Webmin. After installing, login to Webmin. Webmin will enable us to control who gets access to the Squid reports. We will also have an easy to use web-based interface for configuring the report format.

4. Click Un-used modules in the side bar. Next click Squid Report Generator. We need to configure SARG so click module configuration.

5. Change the value of Full path to SARG configuration file to /etc/sarg/sarg.conf then click the Save.
Next time you need to use the Squid Report Generator, look for it under Servers instead of Un-used modules.Generating a report

1. To generate a report, click the Generate Report Now button.

2. Next, click View completed report.

3. Click the latest generated report.

4. Review the generated report.
Sunday, February 13, 2011
Online Diagram Software and Flowchart Software - Gliffy
Online Diagram Software and Flowchart Software - Gliffy
Need a replacement for your Visio software? Here's an online application where everything you need for illustrations, visualization and diagramming capabilities can be found from a single site.
It's a cloud application...
Well apparently, I just used some proprietary application such as Visio2007 when I'm using a Windows platform. But since most of the time I use Linux, I tend to use Dia which is also a good free application but not that as graphically smooth like Visio. Anyway, it doesn't really matter how it looks because my main purpose is to have a diagram for my analytical info and design. And until I found Gliffy which is I think its been there for quite sometime.
I made a sample layout for my trial period.

Sunday, January 9, 2011
Convert AVI to MP4 in Fedora 14 Linux
The Mplayer program includes a utility for converting multimedia from one format to another called MEncoder. The MEncoder utility can be used to convert AVI video files to the MP4 format from the command line. The resulting video can be played on Apple iPods and other handheld devices. The MP4 format is based on the Apple Quicktime container format. MP4 can contain audio only, or audio and video together. However, the standard is to use MP4 to refer to video files and M4A to refer to audio only files.
Difficulty: Easy
Instructions
Things You'll Need:
* MPlayer, MEncoder
1.Download and install MPlayer through your distribution's software repository, or from the MPlayer website.
2.Open a terminal window.
3.Type the command "mencoder input.avi -o output.mp4 -oac copy -ovc lavc -lavcopts vcodec=mpeg1video -of mpeg" to convert the AVI video to MP4.
4.Type the command "mplayer output.mp4" to test the video.
5.Type the command "exit" to close the terminal session.
If you dant have Mplayer installed, just type in terminal
# yum install mplayer mencoder
(must be root to install)
Saturday, January 8, 2011
Old schematics from my 10 year old backup
I have here some of my old schematic diagrams which I compiled around 10 years ago. I have decided to post here as another copy from my angelfire.com account but in no particular order/details.
For those electronic enthusiast, you may find below classic diagrams useful on some of homebrew projects and repairs.
200W PC ATX Power Supply

35Amps, 13.8VDC Regulated Power Supply for HAM/Amateur Radio Enthusiast

Hi-Power Amplifier - Diect-Coupled railing output

For those electronic enthusiast, you may find below classic diagrams useful on some of homebrew projects and repairs.
200W PC ATX Power Supply

35Amps, 13.8VDC Regulated Power Supply for HAM/Amateur Radio Enthusiast

Hi-Power Amplifier - Diect-Coupled railing output

Subscribe to:
Posts (Atom)

-
 There are so many questions on how to block https www.facebook.com in the internet, yet there is no easy answer for it. Facebook and othe...
 -
Recent STF(search the forum) I found how to unlock my ZTE MF637 HSUPA 3g modem. My intention is to look for MF627 unlocking technique for my...
