Saturday, November 22, 2014
Saturday, November 1, 2014
Test Dev on Double Take 5.2
My prep for initial test development in my homelab was to create at least two (2) identical servers S2008-A and S2008-B, to install Double Take 5.2 on both. At the moment, I'm planning to to simulate the features of High Availability and DT-Move and as well to practice on P2V & V2V migrate and conversion excercises.
Server installation on esxi for initial prep...
 Double Take installation...

Replication Console... S2008A is the target server, S2008B is the Source server to replicate on S2008A server.

...got an error setting up, IPaddress of Source and Target must be properly set.

I got it worked after proper IP configuration was set. Mirroring is now running, it should replicate after mirroring is done from the local set replication folder.

A little view from my Workstation10... waiting for Mirroring to complete.


...to be continued. Test dev in progress...
Server installation on esxi for initial prep...
Replication Console... S2008A is the target server, S2008B is the Source server to replicate on S2008A server.
...got an error setting up, IPaddress of Source and Target must be properly set.
I got it worked after proper IP configuration was set. Mirroring is now running, it should replicate after mirroring is done from the local set replication folder.
A little view from my Workstation10... waiting for Mirroring to complete.
...to be continued. Test dev in progress...
Friday, October 10, 2014
Thursday, October 2, 2014
Windows 10 Technical Preview
Here's what I downloaded last night. Also joined Windows Insider Program to gather and share details for the current preview release of Windows 10. My main objective for this install is to rationalize from other previous version such as Win7, Win8 and 8.1- for the enterprise use.
I installed Windows 10 initially on Hyper-V running on my laptop with Win8.1 64bit. The VM for Windows 10 has 2gb memory allocation and a 24gb mSATA SSD for VHD storage. No more 'charms' but still can be used for slate devices.

You have to be very careful if you take the preview install. This preview has a KEYLOGGER! See this article from "The Hacker News".
I installed Windows 10 initially on Hyper-V running on my laptop with Win8.1 64bit. The VM for Windows 10 has 2gb memory allocation and a 24gb mSATA SSD for VHD storage. No more 'charms' but still can be used for slate devices.
You have to be very careful if you take the preview install. This preview has a KEYLOGGER! See this article from "The Hacker News".
Tuesday, September 23, 2014
HomeLAB: Nested ESXi VM's
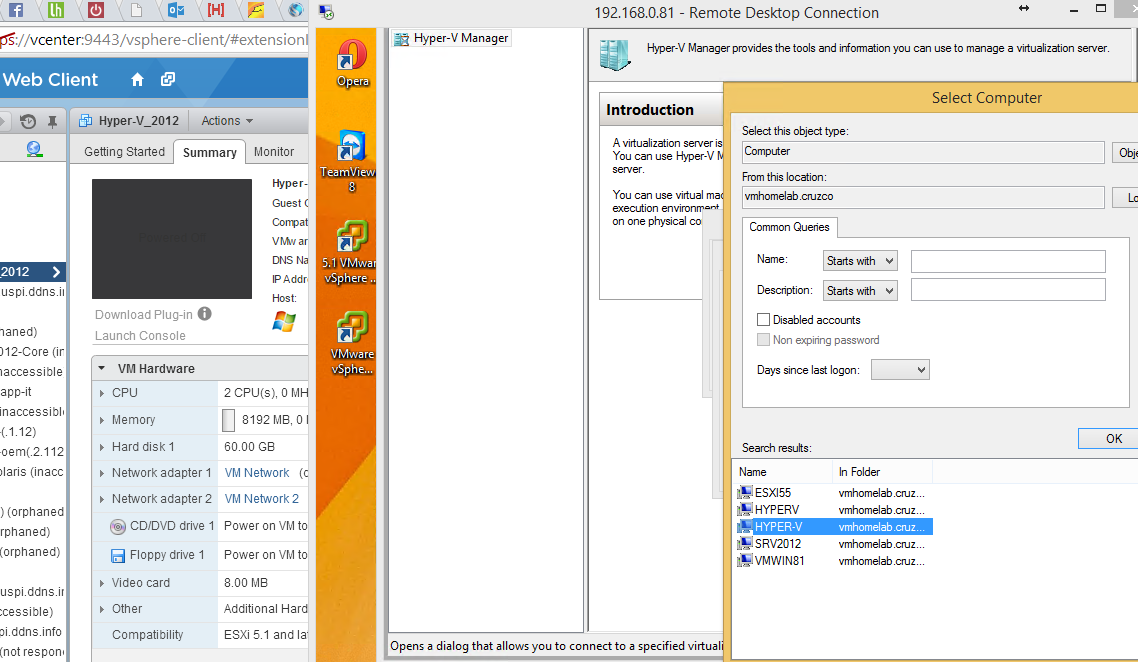
Installing Hyper-V on ESXi 5.1
1. You need to set Hyper-V to run on ESXi 5.1, it will lead
you to an error "Hyper-V cannot be installed: A hypervisor is already
running " when your Hyper-V VM is
not properly set accordingly to run on a nested hypervisor. See knowledge base.
2. From my vCenter Web Client I started to create a new VM
and configure the CPU settings. This should be marked checked “Expose Hardware
Assisted Virtualization to the guest OS”
and then continue up to install Windows Server 2012.

3. Edit the VM's .vmx file and add the following line;
hypervisor.cpuid.v0 = FALSE

4. Now you can configure your Server2012 to add roles,
install Hyper-V on server manager.
5. You can now manage your Hyper-V server from your Windows
8 hyper-v manager or from the Hyper-V server itself.

6. (Optional) My entire homelab has an Active
Directory/Domain Controller. I joined all nested hypervisor under one domain.
Across to my existing basic VMware HomeLAB.
1. Nested ESXi and Hyper-V on Esxi5.1
2. Active Directory Authentication of nested hypervisors from Server2012.


3. UTM applications on VM.

4. Migration of VM's to another Datastore with vCenter client.

Sunday, September 14, 2014
RootZones : Step By Step Guide to Configure VMware vCenter 5.5...
RootZones : Step By Step Guide to Configure VMware vCenter 5.5...: VMware vCenter is the core management platform, and its common for other technologies both from VMware and third-parties to use it...


VMware vCenter is the core management platform, and its common for other technologies both from VMware and third-parties to use it as the central point for accessing ESX hosts and clusters, as well accessing VMs and other components upon which they can add value or further orchestration. At the time of writing VMware support two version of vCenter – an installable version which runs on the Microsoft Windows platform and virtual appliance edition which runs on the SUSE Linux platform. In terms of their core APIs, the two editions are functionally the same. However, there are some features that are for the moment only available on the Windows editions. Historically, third-party add-ons have run as Windows plug-ins. Finally, whilst the scale of vCenter Server Appliance (VCSA) has increased in recent releases, it has lower configurable maximums. In production environments it is the Windows edition that predominates – and this is combination of history (the first version of vCenter was Windows only) and compatibility. With this said, the VCSA is considerably easier to deploy and update/upgrade than the Windows edition – and for this reason it might be more suitable for a small-medium sized deployment where ‘core” virtualization is all that is required. Currently, the features that are only supported by the Windows edition or require a Windows instance to function include:
Linked Mode
Linked mode allows for multiple vCenter instances to be chained together. This might be required if different vCenters are needed for different regions (a combination of network bandwidth limitations or legal requirements perhaps) are deployed, and yet the administration team want to make lift easy by opening one UI to manage these multiple instances. Linked Mode requires the Microsoft ADAM technology to distribute other management data held within the vCenter Database. It’s for this reason you do not see “linked mode” with the VCSA.
Role Sharing
This feature is subset of “linked mode”, and it enables the creation of role for administration delegation to be replicated to other vCenter instances.
License Sharing
Perhaps the most valuable aspect of “linked mode” is the replication of license data from one vCenter instances to another. It means the organizations license entitlements are available across vCenter instances, and are not “orphan” in the case of stand-alone vCenter instances.
Additionally, there are some features and functions that VCSA is either not compatible with or not directly compatible with. For instance the VCSA does not yet support IPv6 or the vCenter Heartbeat Service. The vCSA doesn’t include an “Update Manager” (VUM) component, although it is possible to run on a Windows instance, and register it with the VCSA.
The Windows version of vCenter has a number of sub-services and components, these are explained below:
Single Sign-On
Is service design to easy the logon process for administrators of VMware solutions. This is not aimed at ordinary end-users, and at the time of writing has not associated with single sign-on or pass-through authentication for end-user computing. The idea is the administrator logs in once to the “web-client”, and a token is generate which can be used to pass on that authentication to other technologies such as vCloud Director. It should if implemented well, mean the administrator has to log on once, to then gain access to all other VMware technologies they manage.
Web-Client
This is the core interface of managing VMware ESX hosts and clusters, Virtual Machines and templates – as well as configuring storage and networking. It’s a replacement for the older legacy “C#” vSphere Client. At the moment the older C# vSphere Client is still supported for direct management of a VMware ESX host.
Inventory Service
The Inventory Service enumerates vCenter objects such as VMs, Templates, Hosts and Clusters. The intention of the Inventory Service is remove the workload on the core vCenter service, and improve the process of searching and browsing the vCenter environment.
Update Manager
VMware patch management solutions updates both ESX hosts, virtual appliances – and be also used to upgrade the “VMware Tools” software. This is small package which is installed the guest operating system and adds improved drivers, heartbeat services and an API model that allows for communication from the vCenter management layer into the guest operating system.
Dump Collector
By default if the VMware ESX host encounters a critical error that causes a kernel panic (commonly referred to as a Purple Screen of Death – PSOD), the system will dump system data (not memory contents) that can assist in diagnosing problems. For diskless systems that do not have local storage, the “dump collector” service can be configured. This forces the VMware ESX host to send this diagnostics data across the network. It is particular interest to customers who adopt the “Auto Deploy” method of rolling out VMware ESX in their datacenters.
Syslog Collector
VMware has its own simple “Syslog Collector” which collates all the log files on each VMware ESX into a central location. Whilst the service is useful – you may wish to look at VMware’s Log Insight technology, or alternative look at other syslog tools such as Splunk.
Auto Deploy
Auto Deploy is a method of rolling out VMware ESX host which allows for diskless and stateless operations. The physical server boots across the network using the PXE, and the configuration is delivered by associating the server with a “Host Profile” held within vCenter. It offers a very rapid deployment and easy way to “upgrade” from one distribution of VMware ESX to another. Currently, Auto Deploy requires Enterprize+ licensing.
Authentication Proxy
This an optional and complementary service to Auto Deploy. It allows a VMware ESX host to join a Microsoft Active Directory domain without using administrator credentials. It requires Microsoft .NET SP1 or higher, and Microsoft Internet Information Services (IIS) web-server.
Host Agent Pre-Upgrade Checker
This validates the vSphere environment prior to an upgrade.
Certificate Automation Tool
vCenter and its associated use system generated SSL certificates to encrypt management information. The Certificate Automation Tools allows the administrator replace the installer generate certificates with their own trusted certificates if required.
As the vSphere platform has grown, vCenter has evolved from a “nice to have” in the VMware ESX 2.x era, into an absolute “must have”. This is because important features such as VMware Clustering in the shape of High Availability, Distributed Resource Scheduling, Distributed vSwitches and Tolerance. Additionally, vCenter act the linchpin for other technologies from VMware such as Horizon View, Site Recovery Manager, vCloud Director, vCloud Connector, vCloud Automation Center and so on. vCenter now standards at the centre of many the orchestration tools from VMware, and such customers are increasingly concerned about its availability as a management service. VMware do support a virtual instance of vCenter, and indeed the clustering technologies in the platform do offer resiliency and availability. For customers with higher uptime requirements VMware supports a technology called “vCenter Heartbeat Service” (a OEM version of NeverFail’s technology) which improves vCenters over all uptime. It has system by which the administrator can configure a “Primary” and “Secondary” server that act as mirror of each other. If the “Primary” goes down the “Secondary” automatically takes over. The vCenter Heartbeat Service is licensed separately from the vCenter product itself, and some organizations regarded as optional extra that is beyond their needs. Other availability solution such as Microsoft Clustering Service (MSCS) can and do work, but VMware does not certify these solutions. VMware does with vSphere 5.5 support the clustering of the database that backs the vCenter service itself. KB Article 1024051 outlines VMware’s current position on the availability of the Windows edition of vCenter.
Hardware & Software Requirements
Hardware Requirements:
For the core services (SSO, Web-Client, Inventory, vCenter)
12GB – or more based on the allocation of memory allocated to the Inventory Service during installation
2xvCPU
100GB recommended – with 40-60GB free space. Log allocation size is now 450MB larger than previous 4.x release
Note: In a modest homelab environment you maybe able to reduce these values, but beware that your mileage my vary in terms of the quality of your experience.
Software Requirements:
SQL Native Drivers relative to the version of Microsoft SQL used
.NET 3.5 SP1 (vCenter will download this if not present, assuming Internet access is present)
Web-Browser: IE8/9/10, Mozilla FireFox 24.0, Chrome 30. Safari is not supported.
Flash: Adobe Flash Player 11.5.0 or higher
Database Requirements:
The Windows edition of VMware vCenter supports a number of different database venders including Microsoft SQL and Oracle specifically:
Microsoft SQL Server 2005 Standard & Enterprise
Microsoft SQL Server 2008 R2 Express (For small deployments with 5 hosts, and 50 VMs)
Microsoft SQL Server 2008 R2
Oracle 10g/11g
Update: vCenter 5.5 will work with Microsoft SQL Server 2012, and has done since vSphere 5.1.
Creating vCenter Service Accounts in Microsoft Active Directory
Like many Windows based systems, vCenter does require “service accounts” to run the core services securely. These service accounts can also be used to assign permissions to the databases the service accesses
It’s not considered best practise for the “Administrator” account to be used by background system services, as the “Administrator” account is often renamed or disabled to prevent miss use. These service accounts can be located in Microsoft’s Active Directory, and be given local rights to carry out the installation of vCenter. Since vSphere4.0, VMware has support “Windows Authentication for SQL Servers”. This is where the core service and database user accounts are stored in the directory services rather than using either local accounts or accounts stored in Microsoft SQL databases (often referred to as “SQL Authentication”. “Windows Authentication to Microsoft SQL Server” is regarded as being more secure than “SQL Authentication”, with the added benefit of the user accounts concerned being located in central directory service. This should make them easier to manage from a password reset perspective, if it the service account becomes regarded as compromised.
Both the core vCenter service and the vCenter Update Manager (VUM) service require database – and therefore its not uncommon for service account be created for each service.
1. Open up “Active Directory Users and Computers”
2. Create an OU for the “VMware Service Accounts” [OPTIONAL]
3. Create a user for the vCenter Database/Service Account and for the vCenter VUM
4. Enabled the option to set “User cannot change password” and “Password never expires”. This prevents the account becoming locked out due to password reset policies on the domain. [OPTIONAL, BUT RECOMMENDED]
Configuring Microsoft 2008 SQL R2 for vCenter
Creating the Database
In this tutorial we will be configuring Microsoft 2008 R2 for vCenter using Windows Authentication. For this to work “Windows Authentication” will be enabled during the installation of Microsoft SQL Server. The default is for “Windows Authentication” only, although the SQL Administrator has the option to set both “SQL Server and Windows Authentication Mode”. If you are ensure of what mode is currently in use, it can be checked by opening the “Microsoft SQL Server Management Studio”, right-clicking the server (local), Properties and the Security tab:
1. Open Microsoft SQL Server Management Studio
2. Login to the SQL Server
3. Right-click the +Database node, and choose New Database
4. Type a name for the new database, and change the location for the database files. Microsoft SQL Server can by default point to location on the C: drive within Program Files. It’s better practise to store the database files in separate partition/disk to avoid situations where database files grow rapidly and fill the operating systems root partition.
5. Click OK to create the database
Set Permissions to the Database
Next we need to grant our service account user rights to the database. This involves allocating the user, and then setting the rights to the database itself.
‘1. In the Microsoft SQL Server Management Studio expand the +Security node
2. Right-click the +Logins node, and select New Login
3. Use the “Search” button to locate the vCenter Service Account created earlier. In this case the account is called vcdbuser-nyc. Alternatively, you can type the location for the user account manually.
4. In the same dialog box, change the default database to be the database created earlier. In this case the database is called vcdb-nyc
5. Click OK to add the user.
6. Next we need to set the permissions on this database, Right-click the user account – and then under User Mappings. Grant the vCenter Service Account the privilege of DB Owner to both the MSDB and the vCenter database.
IMPORTANT: These privileges maybe regarded is too permissive for your organizations SQL security policies. The official VM guide to SQL permissions has extensive detail on setting these privileges. Please refer to the “Preparing vCenter Server Databases” in the official “vSphere Installation and Setup” guide for further information
Installing vCenter
Introduction
VMware vCenter is composed of many different services as well as the core “vCenter” (vxpd) service itself. In simple lab or SMB environment one Windows instance could be created, and all the roles could be installed to that single instance. The vCenter installer refers to this configuration as a “Simple Install”
In larger corporate or enterprize environment a more “distributed” model exists where each of these roles could be installed to separate Windows instances. In some cases (such as the Single Sign-On vCenter Service) you can have more than one server instance, and have them distributed geographically. If couple with a load-balancer some of these services can be made to have greater resiliency. If you are attempting a “Custom Install”, VMware does recommend installing the various components that make up vCenter in this order:
1. vCenter Single Sign-On
2. vSphere Web Client
3. vCenter Inventory Service
4. vCenter Server
Installing the SQL Native Drivers and Configuring a DSN Connection to Microsoft SQL Server
The vCenter server will need the “SQL Native Drivers” installed relative to your version of Microsoft SQL Server. These are contained in what Microsoft call “Feature Packs” located on Microsoft website here:
SQL 2008 Native Drivers: http://www.microsoft.com/en-gb/download/details.aspx?id=30440
SQL 2012 Native Drivers: http://www.microsoft.com/en-gb/download/details.aspx?id=29065
Once these have been installed by the administrator, you can allow your vCenter Service Account local administrator rights to configure a ODBC “Data Source Name” or DSN connection, and carry out the installation itself.
To configure the ODBC DSN Connection to the SQL Server:
1. Login as the vCenter Service Account, in this example this is the vcdbuser-nyc
2. Open the Data Source (ODBC) control panel
3. Select the System DSN tab, and the Add button – and select the SQL Native Driver that was installed earlier
4. In the “Create a New Data Source to SQL Server” wizard, assign a name for the DSN, and select the SQL server. In this case “vCenter” is the name of the DSN, and SQL2K8NYC is the name of the SQL Server:
5. In this example “Windows Authentication” is being used, and the vCenter Service Account is logged in locally. So clicking next should use these credentials and pass them through to the SQL server:
6. The next page should have the vCenter Database created in SQL select automatically, if not use the X Change default database option to select the correct database:
7. Clicking Next and Finish should trigger a test attempt to connect to the SQL Server. This a relatively crude test that merely tests basic connectivity, it does not test such options as having the right permissions on the database.
A Simple vCenter Install
Once you have attached the vCenter .ISO to the vCenter Server, you should find the “autorun.exe” opens, at the welcome screen:
Installing SSO Service
A simple install essentially chains four different installations together of the four core primary services that make vCenter work – SSO, Web-Client, Inventory and vCenter service itself.
1. Ensure that “Simple Install” is selected, and click Install
2. Click Next, to the welcome screen for the SSO service
3. Accept the EULA
4. The installer will check the pre-requistites for the SSO service – the vCenter should have both a forward and reverse lookup records in DNS (Aname and PTR records), and joined to an Active Directory domain.
5. SSO establishes a “Domain”. The default name is vSphere.Local. It contains its own “administrator” account, and is separate and discrete from the “administrator” account on the Microsoft Active Directory domain. The password here must be >8 long and contain four character classes – 1xUppercase, 1xLowercase, 1xDigit, and 1xCharacter. Therefore P@ssw0rd is a valid password.
IMPORTANT: This account is the first and only account that can logon to vCenter in the first instance. The logon name would be administrator@vSphere.Local and the password set here. This account is both the SSO administrator account AND the vCenter default administrator account. Once configured it is possible to browse the Microsoft Active Directory Domain, and delegate responsibility to others and groups. Be careful with different keyboard types and county codes, as its very easy to assign a password twice that has unexpected characters included in it. If in doubt type the password into a test editor to confirm the characters inputed. A classic example is accidentally using the US Keyboard type on a UK Keyboard, and finding the £ is actually the # character, and that ” is actually the @ character. This can also cause logon head-aches if you move from one computer to another.
6. Specify the site name:
7. Specify the HTTPs TCP Port number for the SSO Service, the default is port 7444
8. Accept or change the path for where the files that make up SSO will be copied
9. As this first installation of vCenter in the corp.com domain, this will be configured as the first SSO server in that domain:
Installing the vCenter Web-Client Service
The installation of the web-client is non-interactive. The administrator has no configuration options to address.
Installing the Inventory Service
The installation of the Inventory Service is non-interactive. The administrator has no configuration options to address. During the installation the Inventory Service registers itself with the SSO Service.
Installing the vCenter Service
1. The install of vCenter begins with a request to input the license key. The license is not required for an installation, and vCenter can be run in a evaluation mode for 60-days
2. For small installations you can use a Microsoft SQL Server 2008 Express instance (this does require more memory to be assigned to the vCenter). In this case we are using an external SQL Server using DSN configuration to access the database:
3. If you are using SQL Authentication, you will need to provide the username/password to access the SQL database, in this case we used “Windows Authentication”, and we were logged in with the vCenter Service Account – so no further configuration was required.
When you click next you will see a pop-up warning.
This is an informational message – and is not a problem with the installation. The warning concerns the fact that SQL Server is set to a “Full Recovery Model”. This is a good feature because it causes SQL Server to use full transactional log, and ensures that if there an outage no data is lost from the database. Transactional Logs can grow incrementally if you do not have an effect backup strategy in place for SQL Server. Regular backs causes the transaction logs to played against the database, and reduced in size. Without a regular backup strategy, these transaction logs grow incrementally until there is no free space left on the SQL Server. Backup your database – you know it makes sense!
4. Next set the password for the vCenter Server Service account password. Configuring this option also sets the right to “Logon on as a service” to this account.
5. The installation does allow you to change the default TCP ports used by vCenter. One port number to watch out for is the vCenter Server HTTP port. The optional “BLAH SERVICE” leverages IIS which default to HTTP/80. If you do intend to install the “blah service” at later stage – watch out for port conflicts with this service.
6. Finally, we need to assign an allocation of memory to the JVM. This is reservation of memory to the JVM process, and the larger your vCenter environment the greater the reservation of memory should be.
At the end of the install wizard you can click “Install”.
During the installation a number of additional components are installed including the vCenter Orchestrator and Storage Profile-Driven Storage. The Simple Installation ends with this confirmation.
Subscribe to:
Posts (Atom)

-
 There are so many questions on how to block https www.facebook.com in the internet, yet there is no easy answer for it. Facebook and othe...
 -
Recent STF(search the forum) I found how to unlock my ZTE MF637 HSUPA 3g modem. My intention is to look for MF627 unlocking technique for my...
